Timeline Assets
Timelines allow you to have multiple videos, multiple audio, multiple images, timed text (e.g. subtitles or closed-captioning), markers, and timeline clips within a session.
Timelines allow you to choose specific cameras angles, audio, and log or view metadata to create and produce a robust compilation for a full-feature presentation in one location, instead of reviewing assets individually.


In the Timeline view, the right sidebar displays asset or timeline information:
- When no assets are selected, the sidebar displays information about the timeline
- When an asset is selected, Information about the asset is displayed in the sidebar.
- When multiple assets are selected, a message displays with information about the associated timeline.
In timeline view, options to play the asset display in the view window, including enlarging the view to full screen. All timelines open at the start sequence, however, clips open at the start of the clip with the clip highlighted on the player.
Timelines are also restricted based on user roles and permissions. If the user has permission to view the clip but not the timeline, the user cannot move before the clip's start time or beyond the clip's end time.
When viewing a timeline, the URL is updated with the path to the specific clip or timeline
selected.
When a clip is selected, the URL changes to the location of that clip. This allows you to send the URL to interested parties.
Create a Timeline
If you have Create Timeline permissions, you can create a timeline in two ways:
- Create an empty timeline from the Actions menu.
- Select assets then create a timeline from the selected assets.
Create an Empty Timeline
- With no asset selected on the Assets tab, click the Actions menu ( ) then select Create Timeline.
- Enter a timeline name.
- Select a Category.
- Select a Format, either SMPTE or Time of Day.
- Enter the Frame Rate per second. Only numbers and a decimal are allowed. Max value is 99.999. Frame Rate is not required if the format is SMPTE.
- Select whether or not there is a drop frame. Not required if SMPTE is the format.
- Enter the Start Timecode. Not required if SMPTE is the format.
- Click Create. A notification displays in the upper right of the screen confirming the timeline creation.
The new timeline is now available for you to add assets.
Create a Timeline with Selected Assets
- Select one or more audio or video assets from the Assets tab.
- From the Actions or right-click menu, select Add to Timeline.
- Select the New radio button.
- Add a Name.
- Optionally, select the categories in which this timeline belongs.
- Select a format.
- Enter a frame rate.
- Specify if there is a drop frame.
- Specify the start timecode.
- Click Add. The assets have been added to the newly created timeline.
View a Timeline
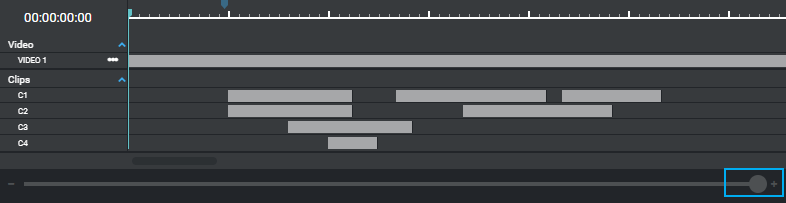
From the Assets tab, double click a Timeline to open it in Timeline view. The assets that make up the timeline display at the bottom of the Content view area. Click + in the lower right of the Content view area to zoom in.
The right sidebar displays metadata information of the timeline as a whole or about a selected asset within the timeline. The left sidebar displays facets based on the assets within the Timeline view. Select a facet to highlight the assets on the timeline that are part of that facet.
You can choose whether or not to display video thumbails by selecting the View video thumbnail options above the video list (between the main video player and the timeline details panel).
To zoom in or out of the timeline view, move the slider at the bottom of the asset list (indicated by the red box in the image below). You can also use shortcut keys to zoom in and out using the keyboard shortcuts:
- Press
=to zoom in.
- Press
-to zoom out.
Double-click an asset to move the playhead to the "in" point of the asset. The thumbnail previews update to the playhead position.
You can set the thumbnail image to use for the timeline:
- From the Timeline view, select a video or image asset.
- From the Actions menu, select Set As Timeline Thumbnail.
Add Assets to a Timeline
To add additional assets to a Timeline:
- Select one or more assets and select Add to Timeline. Ensure the Existing radio button is selected.
- Select the associated timeline from the Name menu. As of release 2.1, you can select multiple timelines if your user role allows it.
- Click Add. The notification pop-up displays a confirmation that the asset was successfully added to the timeline.
Review a Timeline
To review your timeline and begin working within it:
- Find the timeline in the Assets tab. All timelines have the timeline icon.
- Double-click the timeline to open it in the display.
The timeline view displays associated video files, audio files, clips, images, timed text, and markers that have been added.
Playhead
The Playhead displays the controls for the main video player, video previews, and timecode display.
- The playhead (Indicated by the vertical color bar) spans over all assets.
- The main video player buttons control the playhead (Play, Pause, Seek Forward/Reverse).
- You can move any asset to the playhead position by selecting an asset, moving the playhead to the desired location, then selecting the Action menu then Snap to Playhead.
Timeline
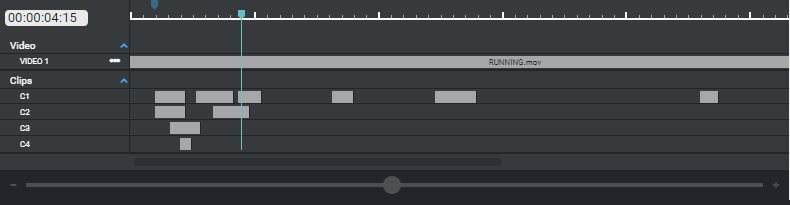
The time format in Timeline View displays the timecode for the timeline in hours:minutes:seconds.milliseconds. Users have the ability to:
- Fast forward
- Supports up to 16x speed
- Frame step
- 'Frame step' is 50ms.
- Use keyboard shortcuts
- Decrease Playback:
J.
- Increase Playback:
L.
- 'Frame Step' Forward: arrow right.
- 'Frame Step' Backward: arrow left.
- Reset timeline clip creation:
Esc.
- Decrease Playback:
When a timeline is configured as Time of Day, dates display at the top of the time bar when zoomed out. In the Asset Info in the right panel, the Format indicates whether the timeline is configured as Time of Day or SMPTE.
Video
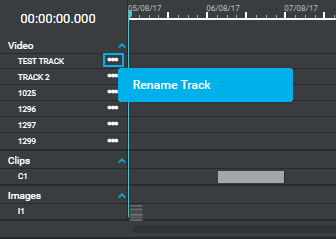
The video tracks display in a sequence (Video1, Video2, Video3, etc.). The primary video displayed is the one selected on the right side. The scroll bar allows you to navigate the list of videos within the timeline. By default, each video file name has Video followed by a number that indicates the order in which the file was added to the timeline.
You can rename the default video track names by clicking the three dots to the right of the track name and selecting Rename Track. Enter the new name, then click Confirm.
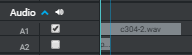
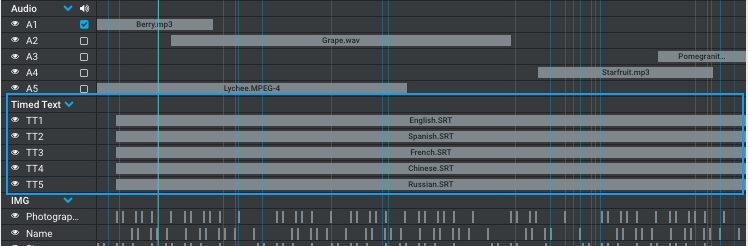
Audio
The audio files are displayed in the timeline. A check mark lets you select which audio track plays when the timeline is running. If an audio track is not selected, the audio associated with the video plays. Each audio file is designated with an "A" followed numerically in order of the file added to the timeline.
Clips
The clips created from the timeline view are displayed below the audio files. If a clip overlaps an existing clip, an additional line is created below the first clip line. Each clip file is designated with a "C" followed numerically in order of the file added to the timeline.
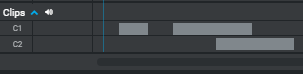
Hovering over a timeline clip displays information about the clip, including name, in and out times, and duration.
Timed Text
Timed text assets can be added to the timeline view. Each timed text asset will have its own row in the Timeline view.
If timed text does not have a timecode offset, then it is placed at the beginning of the timeline. To move the timed text to another location, place the playhead where you want the timed text to begin, select the timed text, click the Actions menu, then click Snap to Playhead.
If you have timed text in a timeline, you can turn on/off closed captions or subtitles. Click the
Closed Caption icon, located to the right near the New Marker icon. If you have multiple timed texts, select the timed text that you want active. When you turn on timed text, the text displays on the video player.
If you search for text using the Search bar, matching text is indicated in timed text. A timed text asset turns white if there is a match. Blue bars appear in the timed text asset to indicate points where the text match occurs.
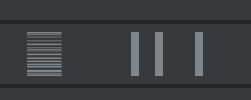
Images
Images are displayed in a single line in the timeline view. Single images appear as a single horizontal line. A cluster of multiple images within the same timeframe is displayed as horizontal lines.
If an image has a time of day timecode, the image is placed on the Time of Day timeline. When images are added to a timeline without a timecode, they are added at the beginning of the timeline. To move any asset to somewhere else in the timeline, select the asset, move the playhead to the desired location, then select the Actions menu then Snap to Playhead action.
Hover over an image bar to display a thumbnail of the image. Double-click an image bar to open the image in a dialog.
For a group of images, you can use the arrows in the dialog or your keyboard's left and right arrows to click through the cluster of images. Click the Select Image button (or press Enter key) to close the dialog and display that image's information in the right panel.
Scale Timeline
The left-right scale selector at the bottom of the timeline allows you to adjust the scale at which the timeline displays in order to see the timeline at a broader or minute scale.
- Broad view

- Minute view
To find a specific time, enter the time in the time representation field.

Modify an Asset in a Timeline
Metadata can be modified based on user permissions. To modify an asset within a timeline:
- Select the asset. All assets are selectable (markers, clips, video files, audio files, etc.).
- When selected, the information panel on the right displays editable properties.
- Update as required and click Save.
Add to Track
You can move videos to different video tracks within Timeline view.
- Open a timeline that you want to modify.
- In Timeline view, select one or more video assets.
- From the Actions menu, select Add to Track.
- Choose the track to which you want to move the asset(s). Note: A video asset cannot be moved to a track that will overlap an existing video. Therefore, only tracks that can accept the selected asset(s) are available in the destination list. If no existing tracks can accept the move, New Track is the only option.
- Click Confirm.
Delete an Asset from a Timeline
If you have permission to modify Timeline contents, you can remove assets from a timeline.
- Select the asset in the timeline.
- From the Actions menu, select Remove from Timeline.
- Confirm the removal of the asset and click Remove. If you are removing multiple images, a dialog displays indicating the number of assets selected.
Create a Clip
To create a clip within a timeline:
- Define the clip using the Mark In and Mark Out buttons or keyboard shortcut keys (i for mark in and o for mark out). A blue clip bar identifies the length of the clip.
- Click the Create Clip icon or use keyboard shortcuts c, x, or ctrl+u.
- The New Clip panel appears on the right. To quickly save the clip, press Command+Shift+S (Mac) or Ctrl+Shift+C (Windows); the clip is saved with the default name. Or, enter a clip name and click Save.
- The new clip displays in the timeline, and is searchable in the Asset tab.
- The default name of clip is "[Timeline Name] Clip [in timecode]"
Hovering over a timeline clip in the timeline displays information about the clip, including name, in and out times, and duration.
When viewing a clip, use the following keyboard shortcuts to quickly move through the clip:
J– Play backwards. Press multiple times to increase speed.
K– Pauses (does not resume play after pause).
L– Play forwards. Press multiple times to increase speed.
- Spacebar – Pauses or plays at 1x speed if already paused.
Create a Marker
A marker delineates a mark across all assets at a given time. Markers can be created, updated, and deleted within the right panel. To create a Marker:
- Select a point along the timeline.
- Click the New Marker icon, located to the far right of the playback controls.
- Enter the name of the marker in the New Marker panel and click Save.
When selected, the Marker metadata displays in the information panel.
To delete a marker, select the marker in the timeline, click the
Actions menu, then select Delete. Confirm the deletion.

Hovering over a marker displays the marker name and in point.
To move forward to the next marker, press Shift+M. To move backward to the previous marker, press Shift+Alt+M.
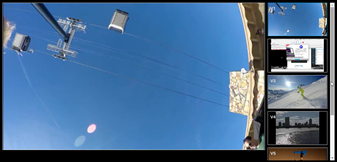
Snap to Playhead
The Snap to Playhead action moves an asset on the timeline to the time selected on the timeline. To move an asset to begin at a specific time on the timeline:
- Select the asset (Video, Audio, Clip, Timed Text, Images) in the timeline.
- Click the area in the timeline where you want that asset to begin playing.
- From the Actions menu, select Snap to Playhead (keyboard shortcut P). The asset then moves to the playhead where the blue bar cuts across the timeline. For example, the image shows where V5 was moved to the Playhead line.
Search within a Timeline
Users have the ability to search and use Advanced Search within a timeline to find all assets within the Timeline (Video, Audio, Markers, Clips, and Timed Text). You can also filter timelines using the facets on the left-hand side.
To search for an asset within a timeline:
- Enter the name of the asset in the Search Term field.
- Optionally, refine your search terms by clicking Advanced Search to use Query Builder or RQL Editor (see the Asset Search section for option details).
- Click Search. The associated assets highlight in the timeline.
- Reset the search by clicking the X icon in the search term bar.
- All assets in the "timeline view" will lose their search result colors.
- Resetting the advanced search is the only way to remove the search result colors.
Play Audio Track
In Timeline view, you can select an individual audio track for playback. Only one audio track can be selected at a time. If no audio track is selected, the embedded proxy will play on the active video player.
If an audio track is selected and the audio track is within the playhead time span, then that audio track will be played.