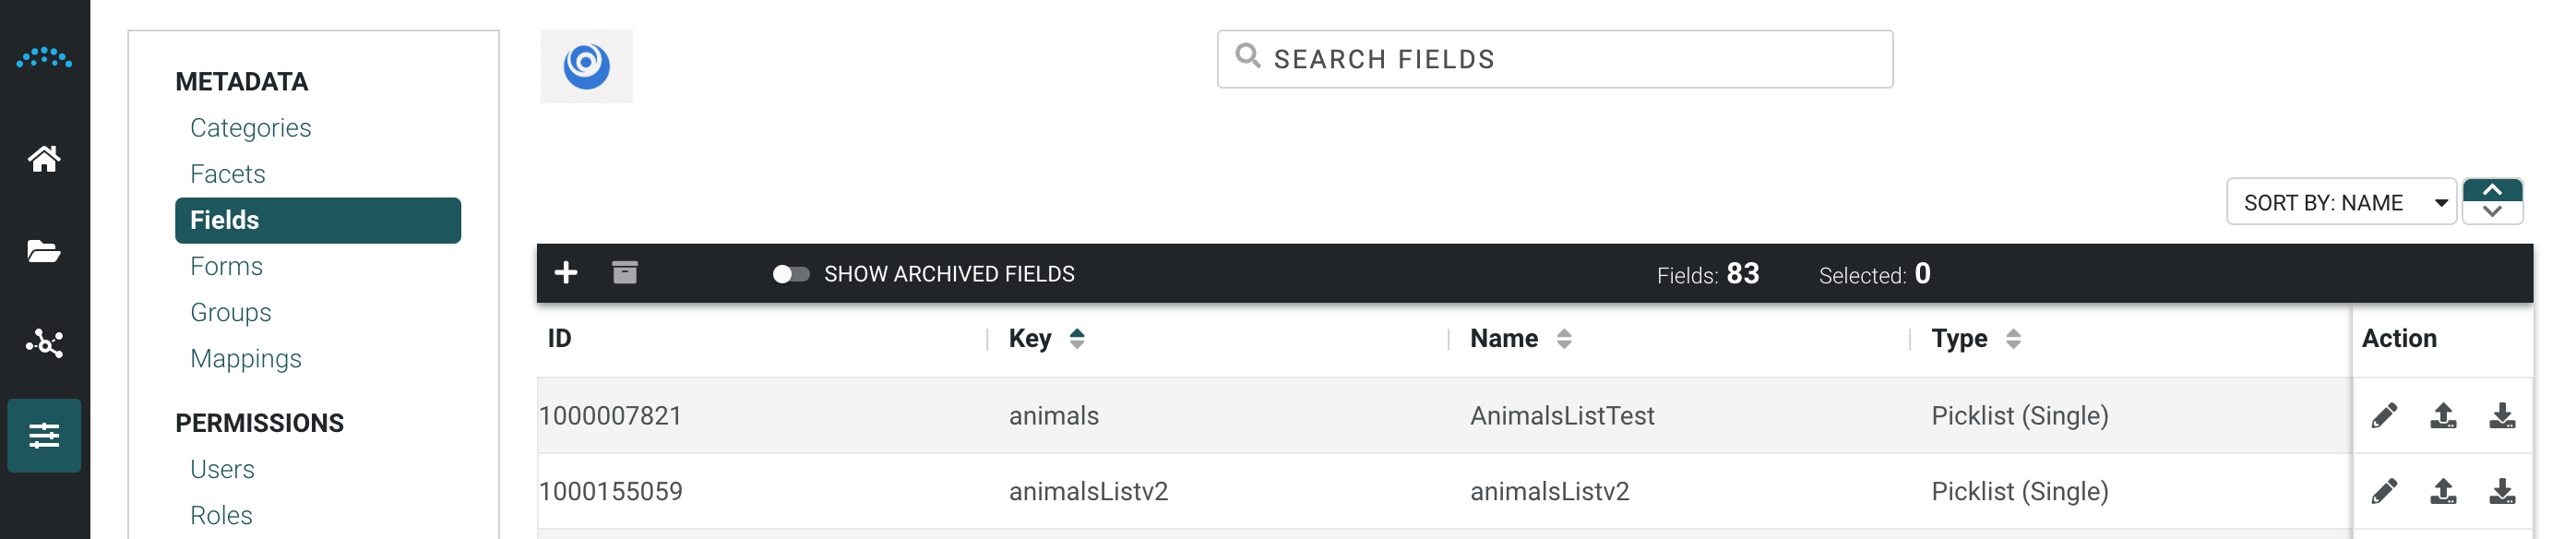
Fields Page
Fields are the lowest level of a hierarchy. To view the existing metadata fields, select Metadata from the left menu then Fields.
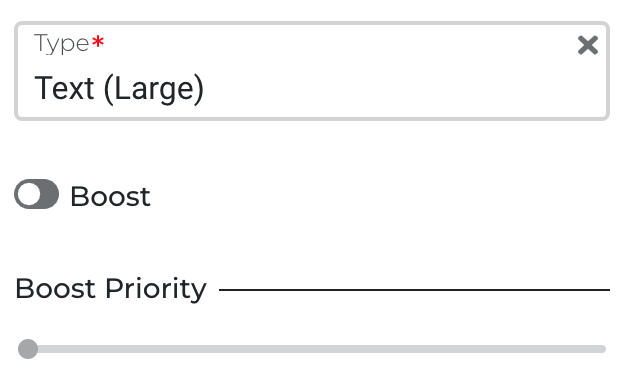
- If a field is archived, the Boost and Boost Priority fields are disabled. Archived fields are not shown to users in the user interface but assets with values set on that field are not removed.
- If a Boost is not active, the Boost Priority field is disabled.
To create a new metadata field:
- Click the Add icon at the top left.
- Enter the field name.
- Select the field data type. See Picklist Fields below for information specific to picklists.
- Assign the field to it’s group
- Determine if the field is a member of one or more metadata forms
- Choose to have the field available to end users in the inspector/preview panel
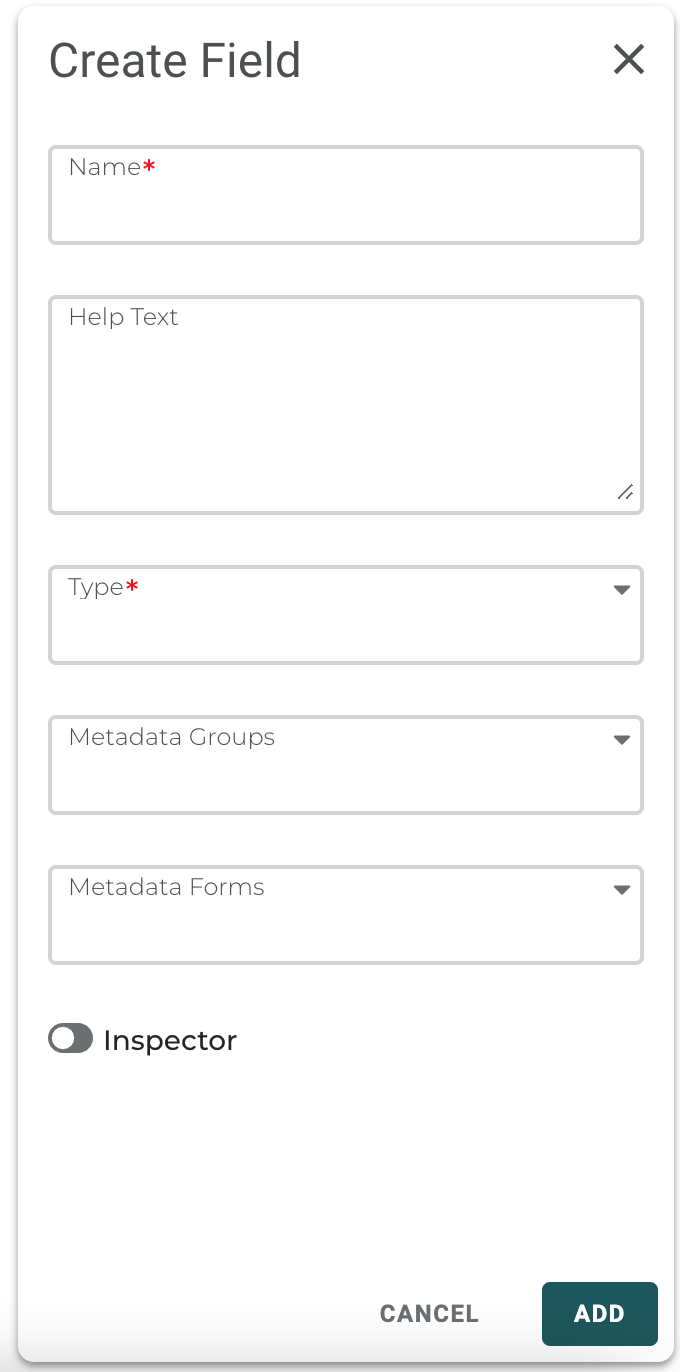
- Turn on the Boost toggle if the field is searchable.
- Specify the Boost Priority. This value indicates how much to weight the field for its relevance when doing a basic search in Reach Engine.
- Click Add.
Picklist Fields
From the list of fields, you can edit a picklist field in single asset view by selecting the picklist name link in the Name column. This option makes editing a large picklist easier.
When Picklist is selected as the field type, enter the possible values in the Value section.
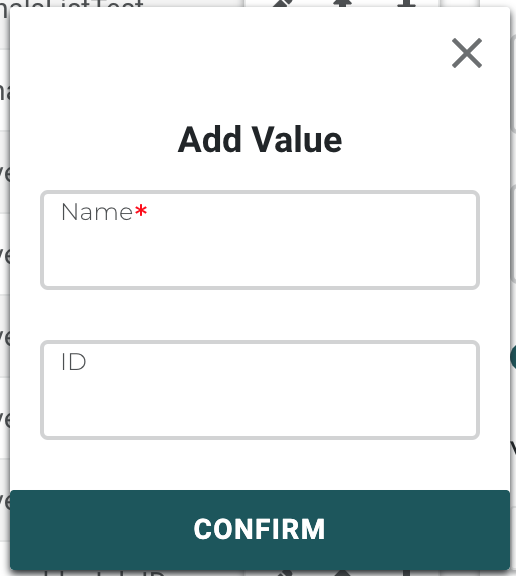
To create a picklist:
- Click the Add Item button.
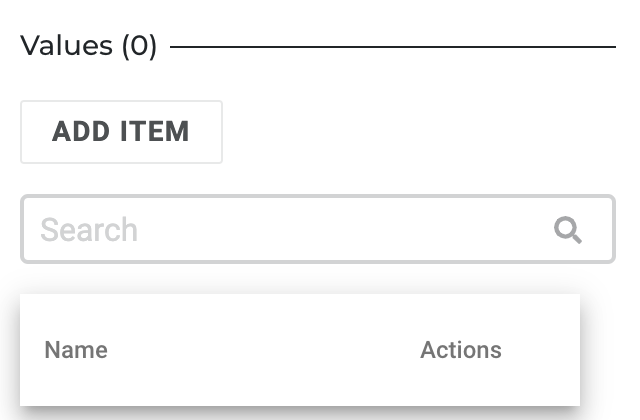
- Enter a name.
- You can enter a Custom ID. If this field is left blank, a unique ID is created.
Note: The ID cannot be modified once set.
- Click Confirm.
Other Picklist Actions
- Use the Search field to filter long picklists so you can find what you need.
- Click the pencil icon to edit an existing picklist item.
- Click the X to remove an item from a picklist. Removing the item only removes it from the picklist. Existing instances of this value remain on assets.
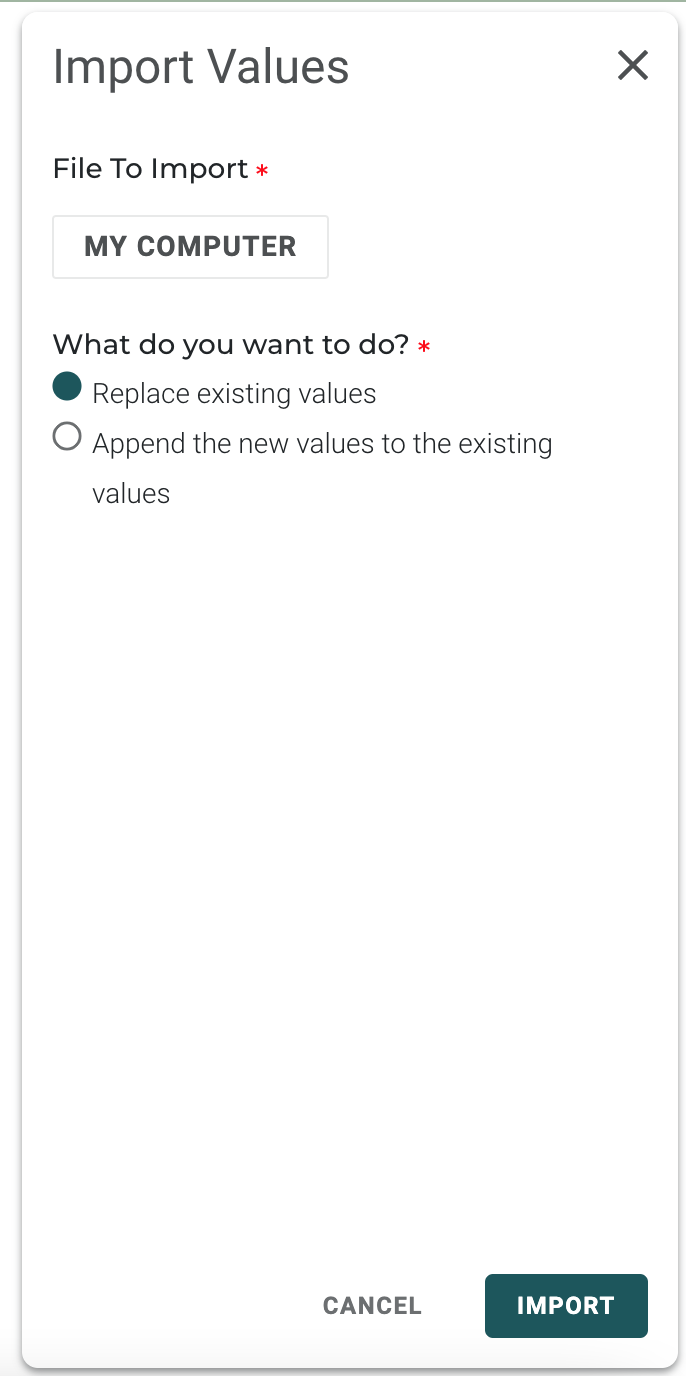
- Import values from a CSV file for a picklist field by selecting the import icon from the picklist field row from the main field screen. You can also select the import icon from the action buttons at the top of single asset view. If you are editing an existing field, choose whether to replace existing values or append values to the existing list. The toggle to edit picklist values after import is selected by default when importing to a picklist field.

- Export picklist items to a CSV by selecting the export icon from the picklist field row from the main field screen. You can also select the export icon from the action buttons at the top of single asset view. The file will contain the name and ID of each picklist item.
